
Winterize RV electrical system components with the same care you give the plumbing, and you avoid the spring surprises most RVers run into: corroded terminals, a dead battery bank, or a charge controller that never woke back up. This guide walks through exactly how to winterize your RV electrical system step by step – the difference between lead-acid and LiFePO4 storage rules, how to protect roof-mounted solar panels from snow, and how to stop the slow parasitic drain that kills batteries left connected all winter.
Table of Contents
- Why Winterizing Your RV Electrical System Matters
- Know Your Battery Chemistry First: Lead-Acid vs. LiFePO4
- Clean and Inspect Battery Terminals and Connections
- Charge, Disconnect, or Maintain: Choosing the Right Storage Method
- Protect Your Solar Panels and Charge Controller
- Prevent Parasitic Battery Drain During Storage
- RV Electrical Winterizing Checklist
- Spring De-Winterizing: What to Check Before You Reconnect
- FAQ
Why Winterizing Your RV Electrical System Matters
Most winterizing checklists fixate on plumbing: antifreeze in the lines, the water heater bypassed, the tanks drained. The electrical system gets a single line item, if that. But batteries, inverters, and solar charge controllers are just as vulnerable to a hard freeze as a length of PEX pipe — the difference is that electrical damage is often invisible until you try to use the system again in spring. Before you put anything into storage mode, it helps to know whether your solar array is even sized correctly and whether your inverter setup was under- or over-stressed the season before, since a system that was already marginal in summer will fare worse sitting idle through freezing nights.
Know Your Battery Chemistry First: Lead-Acid vs. LiFePO4
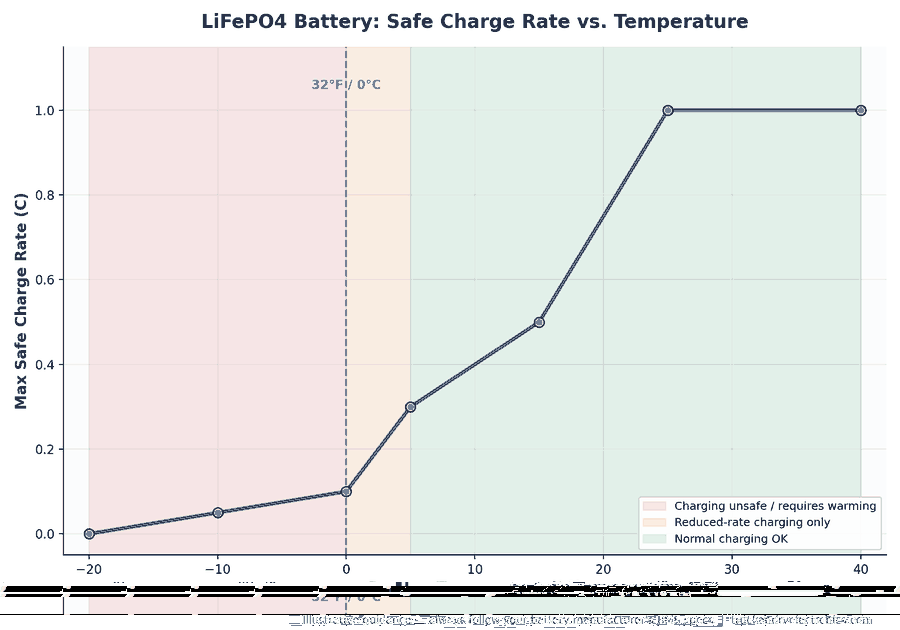
The single biggest mistake in RV electrical winterizing is treating every battery the same way. Flooded lead-acid batteries tolerate cold reasonably well as long as they stay charged — a fully charged lead-acid battery won’t freeze until roughly -60°F, but a discharged one can freeze solid at just 20°F, cracking the case. LiFePO4 (lithium iron phosphate) batteries, now the default in most new RV battery bank builds, play by a completely different rulebook: charging a LiFePO4 cell below 32°F causes lithium plating on the anode, a form of permanent, cumulative damage that reduces capacity every time it happens.
According to Battle Born Batteries, most quality lithium packs use an internal BMS that automatically blocks charging below a set threshold — but that protection only works if the battery is actually built with it. RELiON’s technical guidance confirms the same rule: warm the battery to at least 40°F before reconnecting a charger, even if the BMS would technically allow a trickle. If you’re shopping for a winter-ready pack, our Renogy 100Ah LiFePO4 torture test covers how one popular battery’s BMS actually behaves in real cold-weather testing.
Clean and Inspect Battery Terminals and Connections
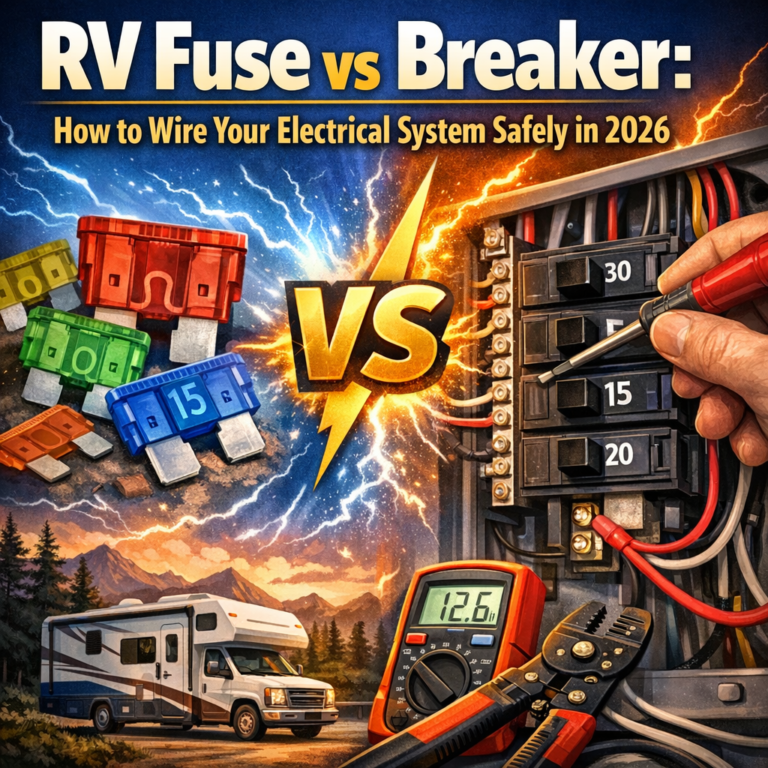
Corrosion accelerates in the temperature swings of storage season, so this is the best time to get ahead of it. Mix a tablespoon of baking soda into a cup of water, scrub the terminals and any exposed lugs with a wire brush or old toothbrush, and rinse with a damp (not soaked) cloth. Once everything is dry, coat the terminals with a dielectric grease or a commercial anti-corrosion spray. While you’re in there, trace the wiring back to your fuse or breaker panel and check for chafed insulation, loose lugs, or rodent damage — our RV fuse vs. breaker wiring guide is a useful reference if anything looks like it needs to be re-terminated or upgraded before storage.
Charge, Disconnect, or Maintain: Choosing the Right Storage Method
There are three viable ways to store an RV battery bank over winter, and the right one depends on your chemistry and how often you can check on the rig. Charge to 100% and fully disconnect works for both lead-acid and LiFePO4 if the RV will sit untouched for months — self-discharge is slow enough (especially for lithium) that a single full charge can often last the season.
Installing a smart battery maintainer or tender keeps a lead-acid bank topped off automatically, but most maintainers are not rated to charge LiFePO4 below freezing, so check the temperature cutoff on the unit before you rely on it. Leaving solar connected with the charge controller left active is the riskiest option in a hard freeze unless the controller has its own low-temperature charge cutoff, because a sunny winter day can trigger a charge cycle on a battery that’s still below freezing overnight. The chart below shows roughly how charge rates need to scale down as temperature drops for LiFePO4 packs.
Protect Your Solar Panels and Charge Controller
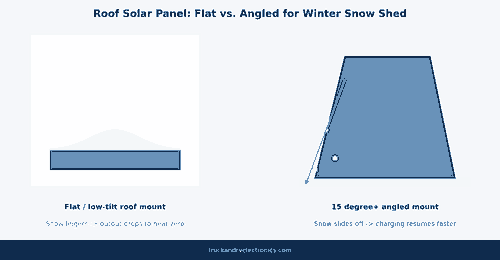
Roof-mounted solar panels left flat or at a low tilt angle accumulate snow that can sit for days, dropping output to near zero and, in a heavy storm, adding enough weight to warp or crack a panel. The U.S. Department of Energy’s guidance on winter weather hardening for solar notes that frameless panels and steeper tilt angles shed snow considerably faster than flat, framed installations — worth keeping in mind if you’re mounting new panels or adding a tilt kit before winter.
If your RV will sit for the season, disconnect the charge controller from the battery bank entirely rather than leaving it in a passive “float” state, and if you have portable or foldable panels, bring them inside rather than leaving them exposed to ice and freeze-thaw cycling.
Prevent Parasitic Battery Drain During Storage
Even with the main disconnect switch off, plenty of RVs have circuits that stay hot: propane leak detectors, radio and stereo memory, some slide-out controllers, and factory-installed alarm systems. Each one draws a trickle that adds up over a three- or four-month storage period. Pull your owner’s manual or trace the breaker panel to identify which circuits bypass the disconnect, and kill those individually at the fuse if you won’t need them. This is also a good time to double check that any aftermarket electrical protection, like the setup in our RV surge protector guide, is still wired correctly and isn’t itself drawing standby power you didn’t account for.
RV Electrical Winterizing Checklist
Use this checklist to winterize RV electrical system components in one pass, once the steps above are done:
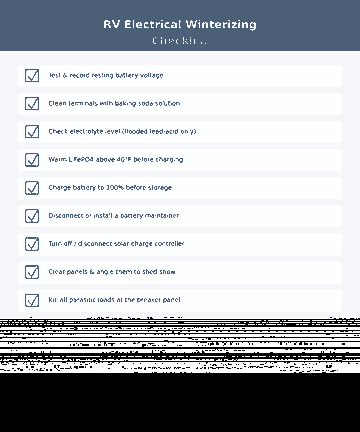
- Test and record resting battery voltage
- Clean terminals with a baking-soda solution
- Check electrolyte level (flooded lead-acid only)
- Warm LiFePO4 above 40 degrees F before charging
- Charge the battery to 100 percent before storage
- Disconnect or install a battery maintainer
- Turn off or disconnect the solar charge controller
- Clear panels and angle them to shed snow
- Kill all parasitic loads at the breaker panel
- Inspect fuses, breakers, and wiring for corrosion
- Label and photograph all disconnected wiring
- Re-check voltage every 4-6 weeks in storage
Spring De-Winterizing: What to Check Before You Reconnect
Coming out of storage deserves the same care as putting it away. The steps to de-winterize RV electrical system components mirror the ones above, just in reverse. Pull any RV cover, see our RV cover buying guide if you used one over winter, and let the roof and panels warm and dry before reconnecting anything.
Check resting battery voltage first: a lead-acid battery under 12.4V or a LiFePO4 pack under 13V (both roughly 50 percent state of charge or less) should be recharged before use rather than reconnected and put straight back into service. Reinspect every terminal and connection you cleaned in the fall, reconnect the solar charge controller, and let the system run for a few hours before loading it with a full camping setup. Confirm your inverter and any high-draw appliances behave normally before you rely on them off-grid.
FAQ
Can I leave my RV batteries connected to solar all winter?
Only if your charge controller has a documented low-temperature charge cutoff and your battery pack BMS (for LiFePO4) blocks charging below freezing. Otherwise, a sunny winter afternoon can trigger a charge attempt on a battery that is still frozen, causing damage that will not show up until spring.
How cold can a lead-acid RV battery get before it is damaged?
A fully charged flooded lead-acid battery typically will not freeze until around -60 degrees F, but a discharged one can freeze and crack its case at temperatures as mild as 20 degrees F. Keeping it charged matters more than insulating it.
Do I need to remove my RV solar panels for winter?
Roof-mounted panels usually do not need to be removed, but they benefit from being cleared of snow and, if possible, angled to shed it faster. Portable or foldable panels are worth bringing inside to avoid freeze-thaw cycling on the frame and connectors.
How often should I check my RV battery during winter storage?
Every four to six weeks is a reasonable interval for most setups. Check resting voltage, top off charge if needed, and glance over terminals for any new corrosion.


One Comment