
Before your first boondocking trip, one thing matters more than your route or your gear list: whether your RV boondocking electrical checklist is actually done. Skip it, and here’s how the night usually goes.
It’s 2 a.m. Your furnace clicks off. The lights go dim. Your phone shows 4% battery, and so does your RV. You’re miles from the nearest hookup. Nobody is coming to save you.
This is how most first boondocking trips actually end. Not with a bear. Not with a flat tire. With dead batteries and a cold, dark rig.
Here’s the good news. Almost every one of these failures is preventable. You just have to check the right things first.
Table of Contents
Prefer to watch before you read? This short walkthrough covers the same off-grid power basics that make or break a first boondocking trip.
Why Campground Experience Doesn’t Prepare You for Boondocking
Let me guess. You’ve owned an RV for a while. You’ve stayed at plenty of campgrounds. A checklist feels like something for beginners.
I’ll go first. On my first boondock, I had five years of campground nights behind me and a fresh 100 amp-hour AGM bank I was sure would coast through the weekend. I was cold and packing up by the second morning. My campground experience had taught me almost nothing about running off-grid.
That’s the trap. Boondocking is not campground camping. At a campground you plug into shore power. If something breaks, you flip a breaker or call the front desk. You have a safety net.
Boondocking has no net. No pedestal. No power. No neighbor with a spare cord. Your electrical system is now the only thing keeping your food cold and your furnace running. If it fails, you fail with it.
And here’s the part veterans hate to admit. The people who get stranded are rarely total newbies. They’re often confident RVers who assumed their setup would “just work.” It didn’t.
The Real Reason Boondocking Batteries Die Overnight
Boondocking batteries die overnight because most owners overestimate usable capacity. A 100 amp-hour lead-acid or AGM battery is damaged below 50 percent, so you really have about 50 usable amp-hours, half the sticker number. Hidden phantom loads and a hard-pulling furnace fan quietly drain the rest before morning.
That single wrong number causes more dead nights than anything else. Say you have a 100 amp-hour lead-acid or AGM battery. You think you have 100 amp-hours to spend. You don’t.
Lead-acid and AGM batteries get damaged if you drain them past the halfway mark. Battery University’s guide to discharging explains why: push them below 50% often and they sulfate and lose cycles fast. So your real, usable battery capacity is closer to 50 amp-hours. Half of what you thought.
Lithium (LiFePO4) is different. You can safely use most of it. But it costs more, and plenty of first-timers don’t have it yet. If you’re weighing the jump, a real-world 100Ah LiFePO4 torture test is a good reality check before you buy.
So find your true usable number first. Then plan around that, not the number on the sticker. This is the mindset shift that separates a smooth trip from a miserable one. You’re not managing a battery. You’re managing a budget.
The 9-Point RV Boondocking Electrical Checklist
Run every one of these before you leave. Not in the driveway of the campsite. At home, where mistakes are cheap.
None of this needs a technician. Every test uses tools you already own or one shunt-based monitor, and you can work through all nine in a single afternoon. If you want the bigger picture behind these tests, it pays to treat your RV power as one complete system instead of a box of gadgets.
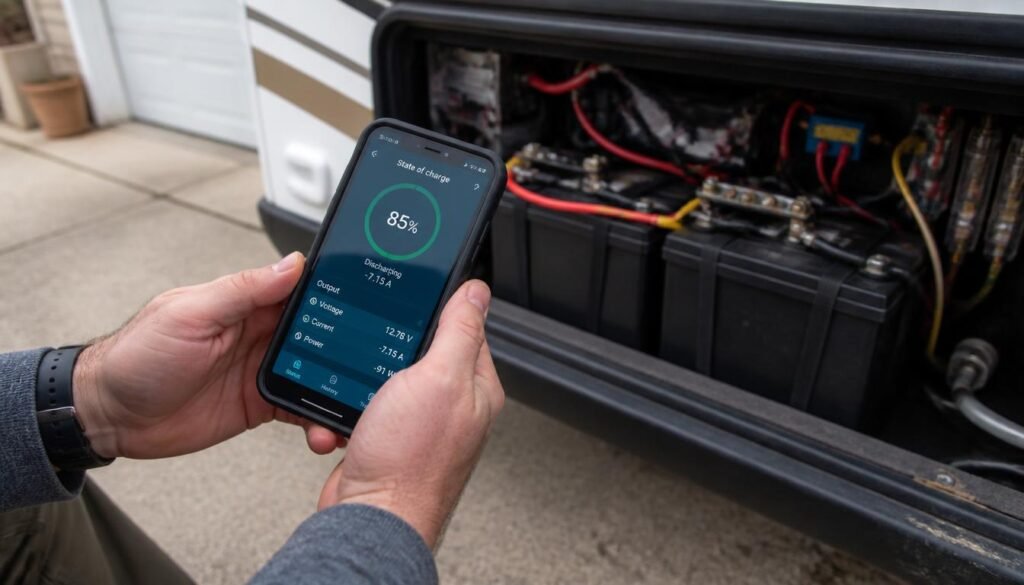
1. Confirm Your True Usable Battery Capacity
Write down your battery type and total amp-hours. Then cut it in half if it’s lead-acid or AGM. That’s your daily budget. Everything you run pulls from it.
Now add up what you actually use. Lights, water pump, fridge board, fans, phone charging. If your usage beats your budget, you have a problem to fix now, not at midnight.
2. Install and Test an RV Battery Monitor (Shunt)
Guessing your battery level by voltage is like guessing your gas by how the engine sounds. It’s a coin flip.
A shunt-based RV battery monitor fixes this. Think of a Victron SmartShunt or BMV-712. It counts every amp going in and out. Now you see your real level as a percentage. You know when you’re at 60% and when you’re at 51%.
That single gauge will save your trip more than any other upgrade. Install it. Then watch it for a full day at home so you trust it.
3. Inspect Every Battery Terminal and Connection
Loose and corroded connections are silent killers. They waste power, create heat, and can quietly starve your system.
Go through your battery bank and main wiring. Look for green or white crust on the terminals. Wiggle each connection. Then do this:
- Clean any corrosion off with a baking soda and water mix
- Tighten every terminal until it’s snug (don’t strip it)
- Add a thin coat of dielectric grease to slow future corrosion
- Check that big wires aren’t cracked, hot, or melted at the ends
While you’re in there, confirm your cable sizing is right. Undersized or corroded runs waste power and build heat, so cross-check yours against an RV wire gauge chart and Blue Sea Systems’ guide to choosing DC wire size.
A clean, tight connection costs you nothing but ten minutes. A bad one can cost you the whole trip.
4. Test Your RV Inverter Under Real Load
Your inverter turns 12V battery power into 120V wall power. It’s how you run a laptop, a coffee maker, or a small appliance off-grid.
Don’t just switch it on and look for a green light. Plug in something real. Run the actual device you plan to use. Watch your battery monitor while it runs. If you’re wiring one in for the first time, follow a proper RV inverter install guide so heat, fuse placement, and wire gauge are handled right.
A coffee maker or microwave can pull a shocking number of amps. Now you know the true cost of that morning coffee. Maybe it’s fine. Maybe you switch to a stovetop kettle or a low-draw 12V coffee maker that skips the inverter entirely. Either way, you found out at home.
5. Hunt Down Your RV Phantom Loads
Here’s the trap almost nobody checks. Your RV drains power even when you think everything is off.
Your propane detector runs all day and night. So does your carbon monoxide detector, your fridge control board, and your radio’s memory. Alone, each one is tiny. Together, these phantom loads can quietly eat 20 to 40 amp-hours a day while you sleep.
Turn everything “off.” Then look at your battery monitor. If it still shows a steady drain, that’s your phantom load. Find it now. That hidden drain runs every single hour, whether you’re using the RV or not.
6. Check Your Solar Panels and Charge Controller
Solar is your refill. Without it, you’re spending a battery budget that never gets topped up.
Look at your panels in real sunlight, not in the garage. Watch your solar charge controller show incoming power. Confirm a few things:
- The panels are actually pushing amps into the battery when the sun hits them
- Your charge controller settings match your battery type (this matters a lot for lithium)
- An MPPT controller will pull noticeably more power than an older PWM one
- No shade, dirt, or cracked panel is quietly killing your output
Not sure your array is even big enough? Run your numbers through an RV solar sizing calculator and sanity-check expected output for your region with NREL’s PVWatts calculator. Both stop you from trusting a system that only works in perfect sun.
If your solar isn’t refilling the bank during the day, you’re on a countdown clock the whole trip.

7. Test the RV Furnace Fan Power Draw
This one catches experienced RVers off guard. Your propane furnace still runs on electricity. The burner uses propane. But the blower fan runs on your 12V batteries.
And that fan pulls hard. It can draw 6 to 8 amps the whole time it runs. On a cold night, the furnace cycles again and again, and that fan can drain your bank faster than almost anything else in the rig.
Run your furnace at home and watch the monitor. See how many amps that fan pulls. Then ask if your battery budget can survive a cold night. If it can’t, plan for it. A warmer sleeping bag or a safe propane heater might save your battery bank. Real cold changes the math even more, so it’s worth reading up on winterizing your RV electrical system before a shoulder-season trip.
8. Verify Your Backup Charging Source (Generator or DC-DC)
Solar is great until you get three cloudy days. Then you need a plan B. Most boondockers use a generator or a DC-to-DC charger from the vehicle. Both need a test run before you rely on them.
If you have a generator, start it. Confirm it has fuel and oil. Then check that it actually charges your batteries through your converter, and how fast.
Some converters charge slowly. You might run the generator for hours and gain less than you expected. Better to learn that in your driveway. If you’d rather stay quiet, a set of portable solar panels gives you a second refill source you can aim at the sun without running the roof array short.
9. Do a Full Boondocking Dry Run at Home
This is the step that ties it all together. And it’s the one people skip most.
Park in your driveway. Unplug from shore power. Then live off your batteries for two nights, exactly like you will out there. Cook. Charge your phone. Run the furnace. Watch that battery monitor drop.
You’ll learn your true daily usage in real numbers, not guesses. You’ll find the weak spot while you’re still 30 feet from a wall outlet. And you’ll walk into your first real trip knowing your system works.
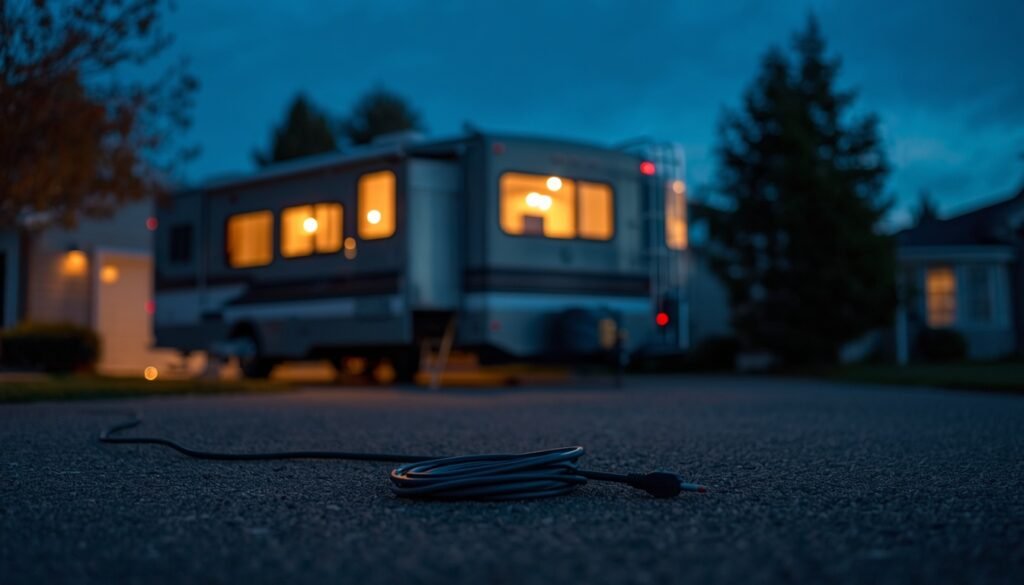
Why an Electrical Checklist Beats Winging Your First Boondock
Some folks will still say all this is overkill. That real boondockers learn by getting stranded a few times. Sure. You can learn that way. It’s just an expensive, cold, stressful way to learn.
Think about what’s riding on your electrical system out there:
- Your food staying cold and safe to eat
- Your furnace keeping you warm on a freezing night
- Your water pump giving you a working sink and toilet
- Your phone holding a charge in case of a real emergency
That last one matters most. In a true emergency, a dead phone isn’t an inconvenience. It’s dangerous.
A checklist isn’t about being fussy. It’s about protecting the stuff that keeps you safe and comfortable when help is far away. The same thinking runs through the RV safety codes, like NFPA 1192, the standard for recreational vehicles, which exists because electrical shortcuts cause fires and failures.
The Mistake Even Careful RVers Make Before Boondocking
Here’s the sneaky truth. Most electrical failures aren’t caused by one big broken part. They’re caused by a stack of small things nobody checked.
A loose terminal. A hidden phantom load. A furnace fan pulling more than expected. An owner who trusted the sticker number.
Each one is small. Together, they drain a battery bank by midnight. That’s exactly why a checklist wins. It catches the small stuff before it teams up against you. You’re not looking for one dramatic problem. You’re closing ten little doors, one at a time.
Your First Boondocking Trip Starts in the Driveway
The batteries don’t care how many nights you’ve logged at a campground. Off-grid is a different animal, and it finds every corner you cut. Your RV boondocking electrical checklist is how you stop guessing and start knowing, before the furnace quits at 2 a.m. instead of after.
So skip the “I’ll deal with it later.” Walk out to your rig today, run test one, and find your true usable capacity. When you’re ready to build the system out the right way, Master RV Solar System Design in 6 Simple Steps is your next stop. Do that work in the driveway, where a mistake costs you ten minutes instead of a freezing night alone in the dark.
Recommended Gear to Pass Every Check
Some links below are affiliate links. If you buy through them, we may earn a small commission at no extra cost to you.
- Victron SmartShunt 500A battery monitor — the shunt-based monitor from Test #2, so you read real state of charge as a percentage instead of guessing by voltage.
- Battery terminal cleaner and dielectric grease — the corrosion kit for Test #3 to clean crusty terminals and protect every connection.
- DC clamp meter — measure the real amp draw of your inverter, phantom loads, and furnace fan in Tests #4, #5, and #7.
- Renogy 2000W pure sine wave inverter — clean AC power for laptops and small appliances, sized so you can test it under real load in Test #4.
- Victron SmartSolar MPPT charge controller — the MPPT controller from Test #6, with a lithium-ready profile and Bluetooth to watch incoming amps.
- Renogy 100W portable solar suitcase — a fold-up refill source you can chase the sun with, ideal for shade parking and as the backup in Test #8.
- Renogy DC-to-DC battery charger — charge your house bank from the vehicle alternator, the plan B you verify in Test #8 (and a must for lithium).
- 100Ah 12V LiFePO4 battery — if Test #1 shows your usable capacity is too small, lithium hands you most of its rating instead of half.
- Mr. Heater Buddy portable propane heater — the safe cold-night backup from Test #7 that spares your battery bank from the furnace fan.
Frequently Asked Questions About Boondocking Power
How many amp-hours do I need to boondock?
Start with a load audit. Add up the amp-hours every device pulls in a day — lights, water pump, fridge board, fans, phone charging — then match your usable capacity to that number. Most modest setups use 50 to 80 amp-hours a day, so a single 100Ah lithium battery is a realistic starting point.
Why do my RV batteries die so fast when boondocking?
Usually because usable capacity is smaller than you think. A 100Ah lead-acid or AGM battery is only safe to about 50% depth of discharge, giving you roughly 50 usable amp-hours. Add hidden phantom loads and a hard-pulling furnace fan, and the bank empties before morning.
Do I need solar to boondock?
Not for a night or two, as long as your battery bank covers your daily use. But without solar or another charging source, you’re spending a budget that never refills. For trips longer than a couple of days, solar, a generator, or a DC-DC charger is what keeps you off the countdown clock.
Is lithium (LiFePO4) worth it for boondocking?
If you boondock often or rely on power for work and comfort, usually yes. Lithium gives you most of its rated capacity, lasts far more cycles, weighs less, and charges faster. Lead-acid still works for light, occasional use as long as you don’t drain it past 50%.
How do I stop phantom loads from draining my battery?
Turn everything off, then watch your battery monitor. Any steady drain is a phantom load: propane and CO detectors, the fridge control board, radio memory. You can’t pull safety detectors, but a main battery disconnect plus switching off unused circuits cuts the rest.
How long can you boondock before the batteries die?
It depends on your usable capacity versus your daily use, plus how much you recharge each day. Run the two-night driveway dry run from the checklist to learn your real daily number, then divide usable capacity by it. That tells you your true off-grid runtime before you ever leave home.



One Comment